
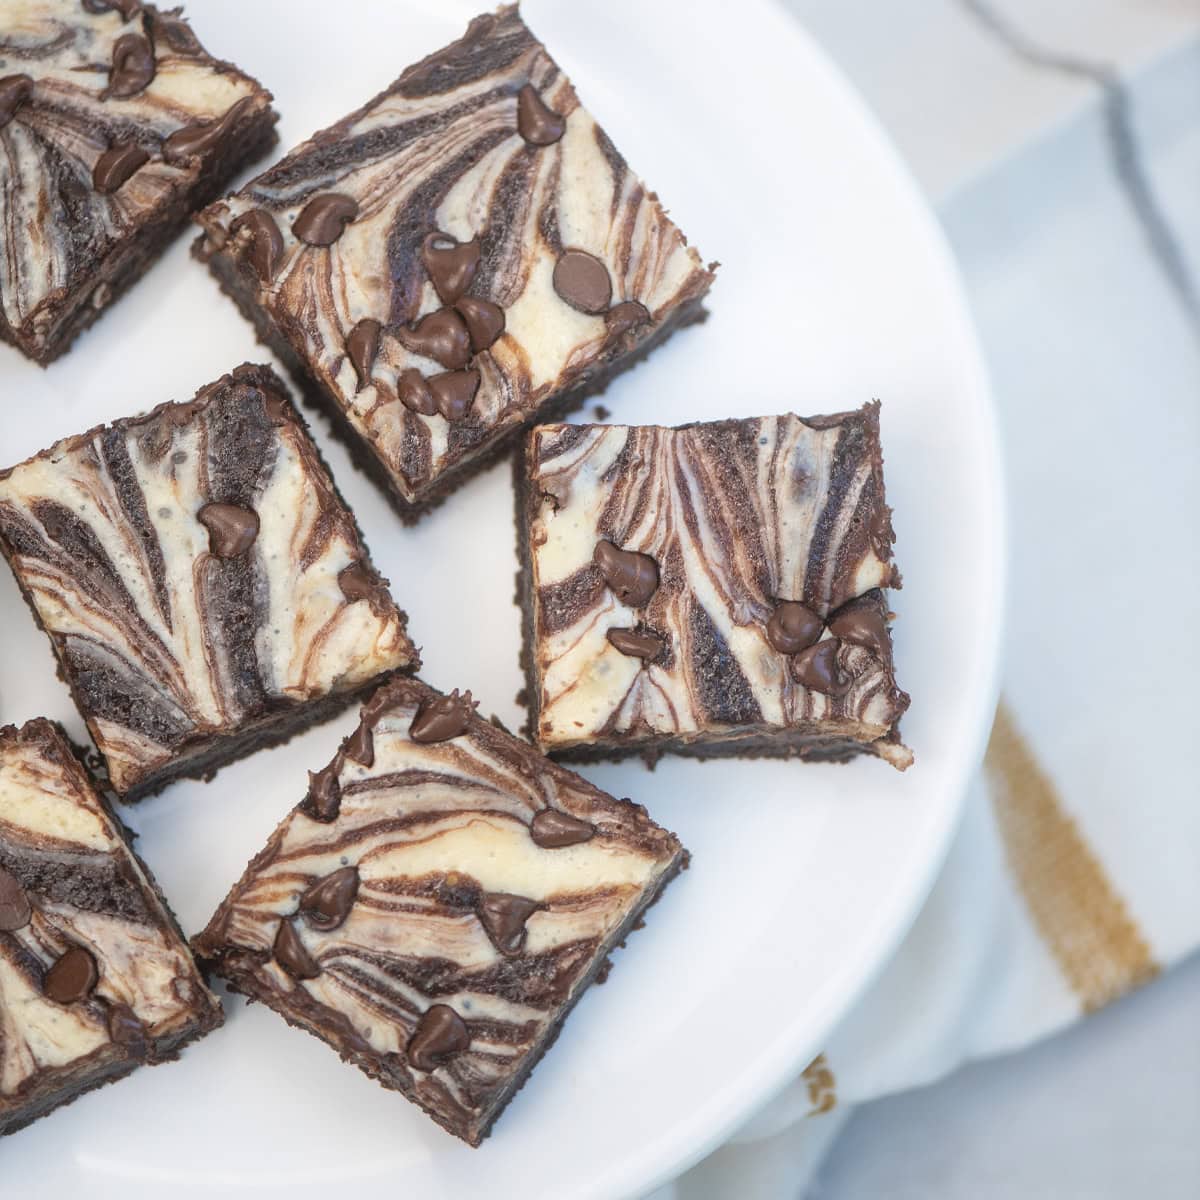
If you’re craving a dessert that’s as beautiful as it is delicious, these Marbled Brownies are just what you need! Starting with a simple brownie mix, this recipe is quick, easy, and perfect for any occasion. The rich, fudgy chocolate base swirls together with a creamy topping to create a bakery-style treat that looks impressive yet takes minimal effort. With each bite, you’ll enjoy the perfect balance of flavors that makes these easy marbled brownies a true showstopper.

When I realize I need to take a treat somewhere and I need it quick, this is one of the recipes I reach for. I love the chocolate balanced with the sweet cream cheese swirl. It is a hit every time! If you need another quick brownie recipe that is a crowd stopper try this Peanut Butter Swirl Brownies recipe!
Ingredients
- your favorite boxed brownie mix for a 9x13 and ingredients listed on the box
- egg
- sugar
- vanilla
- semi sweet chocolate chips
- optional: Hersheys Syrup
See exact quantities in recipe card below
Instructions
Begin by preparing the brownie mix according to the package directions. If your mix doesn’t include a pouch of chocolate syrup, you can enhance the flavor by adding one heaping tablespoon of Hershey’s Syrup. Once combined, spread the batter evenly into a greased 9x13-inch pan. Next, in a separate bowl, beat the softened cream cheese until smooth, then mix in the egg, sugar, and vanilla until fully blended. Pour this cream cheese mixture over the brownie batter. Using a butter knife or spatula, gently swirl the two layers together to create a marbled effect. Afterward, sprinkle chocolate chips evenly on top and bake according to the brownie mix instructions. Keep in mind it may take a minute or two longer than the box suggests. The brownies are ready when a toothpick inserted in the center comes out clean or with just a few moist crumbs. Finally, allow the brownies to cool for about an hour before cutting into squares and serving.
Storage
Do you have a 9x13 with a lid? If not you must get one because you will use it over and over! Here are two that I really like- Link 1 & Link 2. They will last for 3-4 days at room temperature in an airtight container or up to a week in the refrigerator.
Brownie Mix Recipes
These recipes are made just a bit quicker using your favorite brownie mix! However, you can certainly use your homemade brownie mix and just adjust the recipe. They are always a hit!
Top Tips
1. Be sure and get a good marbled swirl. You may need to lift the brown batter to the top in sections to swirl easier.
2. Using a plastic knife to cut your brownies makes it easier to have a clean cut!
Equipment
Having a well stocked kitchen makes baking so much more enjoyable and run smoother! Here is my affiliate link to some of my favorite kitchen tools! Go take a look and grab something you need or need to replace.

Desserts to Try


Marbled Brownies
Ingredients
- 1 box brownie mix for 9x13 + ingredients on box
- 8 ounce cream cheese softened
- ⅓ cup sugar
- 1 egg
- ½ teaspoon vanilla
- ½ cup semi sweet chips
Optional
- 1 Tablespoon Chocolate syrup
Instructions
- Preheat oven to 350℉ (unless otherwise stated on your box) and grease a 9x13 pan. Mix the brownie mix and ingredients on box according to the package directions. If your mix doesn’t include a pouch of chocolate syrup, you can enhance the flavor by adding one heaping tablespoon of chocolate syrup. (I usually use Hershey's)Once combined, spread the batter evenly into the greased 9x13-inch pan.
- In a bowl, beat the softened cream cheese until smooth, then mix in the egg, sugar, and vanilla until fully blended. Pour this cream cheese mixture over the brownie batter. Using a butter knife or spatula, gently swirl the two layers together to create a marbled effect. It may be necessary to gently lift some of the brownie batter up to the cream cheese layer in order to get a swirl. Afterward, sprinkle chocolate chips evenly on top and bake according to the brownie mix instructions. Keep in mind it may take a minute or two longer than the box suggests. The brownies are ready when a toothpick inserted in the center comes out clean or with just a few moist crumbs. Allow the brownies to cool for about an hour before cutting into squares and serving.


Therese says
I made these at the weekend and they lasted all of 5 minutes! I will be making these again and again!
Misty Tannery says
Oh I bet! They don't last long here either!